

I have a special place in my heart (stomach) for waffles. I grew up with the frozen kind; I had two for breakfast everyday, all the way up through high school. I never tired of having the same breakfast, and while I eventually switched up my routine in college, there were a few moments where I caved and bought myself a box, for old time's sakes. At restaurants, if an ice cream-topped waffle is on the dessert menu, it's the obvious choice to finish off my meal. A special breakfast out calls for a waffle. Basically, I'm crazy for them. I don't make them all that often though, and it's mostly out of laziness (I'm not a fan of standing over a hot iron making one waffle at a time). However, when the mood strikes, I just have to make myself a batch at home. There's nothing like a freshly made waffle.

My mom doesn't necessarily share my love for waffles. Her love lies with fluffy pancakes, but even so, she'll make an exception for a really good Belgian-style waffle. My challenge this past weekend, when my waffle craving struck, was to make a gluten-free version my mom would be able to eat too. The batch of gluten-free pancakes I made a few weeks ago were so delicious, that I figured the flour blend I used in the pancakes would be a good starting point for these waffles. The flour blend is a simple mixture of white and brown rice flours, buckwheat flour, tapioca flour, potato starch, and xantham gum. It takes two seconds to whisk together, and then stores in the refrigerator, so pancakes (and waffles now!), are never far from the breakfast table.


Mixing the flour blend with buttermilk, eggs, a bit of oil and vanilla yields a thick waffle batter. It will be lumpy, but that's alright; you don't want to overwork the batter. It's important to let the batter rest for 15 minutes, as this gives the batter a chance to rest and the starches to fully hydrate. This is important, so don't skip it! Then it's time to make the waffles. Scoop out waffle batter onto a hot iron (I used 1/3 cup measure), and cook the waffles. As the waffles come out, set them onto a wire rack, or place them directly on the oven rack inside a 200-degree F oven. Both methods will ensure that the waffles stay crisp on both sides.

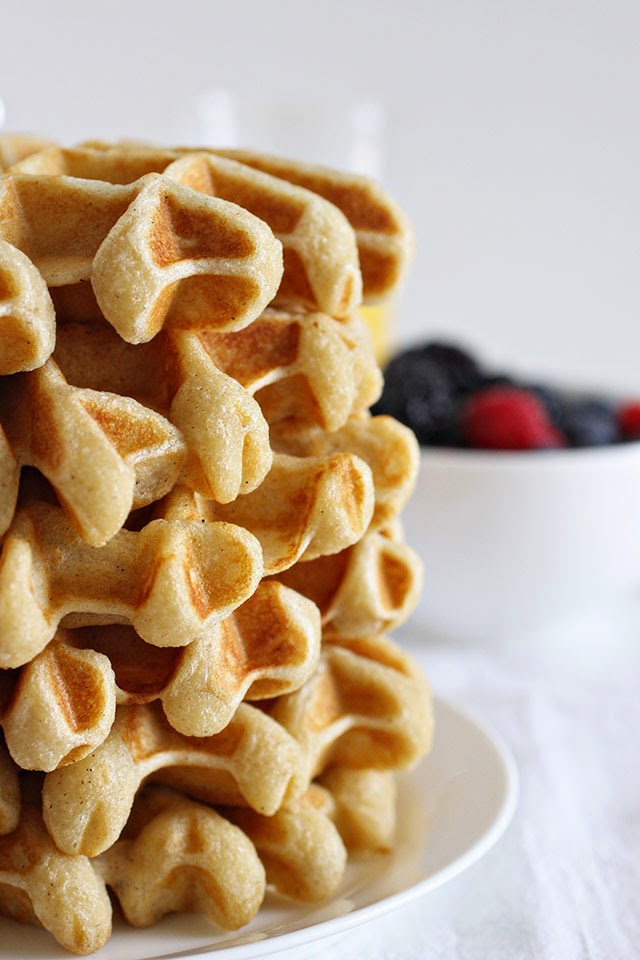
These waffles were a major success, and an indicator that my buckwheat flour blend is one I have to keep mixing up to have on hand. The buckwheat gives the waffles a slight heartiness, yet despite this, they are perfectly light and fluffy on the inside. It's a wonderful contrast from the crisp exterior of the waffles. Topped with a lovely drizzle of maple syrup and a helping of fresh berries, these waffles are an ideal way to start off any weekend morning. I couldn't get enough of them, and was so happy that these gluten-free waffles were as delectable as I had hoped they'd be. I didn't eat the entire batch myself (thank goodness!), but my mom shocked me by asking me to freeze all the leftovers for another day. Now that's a sign of a job well done!
Buttermilk Waffles (Gluten-Free)
recipe adapted from Silvana Nardone
Ingredients
For the Flour Blend
2 cups white rice flour
1/2 cup brown rice flour
1/2 cup buckwheat flour
1 1/2 cups tapioca flour
3/4 cup potato starch
1 tablespoon xantham gum
1 1/2 teaspoons salt
For the Waffles
1 1/2 cups flour blend
1 tablespoons sugar
1 tablespoon baking powder
1/2 teaspoon salt
1 1/2 cups buttermilk
2 large eggs
1/3 cup canola oil
2 teaspoons vanilla extract
Directions

In a large bowl, whisk together the ingredients for the flour blend, making sure to whisk thoroughly. Set aside 1 1/2 cups and store the rest in an airtight container in the refrigerator.
In a large bowl, whisk together the flour blend, sugar, baking powder and salt. In a large measuring cup, gently mix together the buttermilk, eggs, oil, and vanilla until combined. Add the liquid ingredients to the dry ingredients, and stir together until just combined and no visible streaks of flour remain. Let the batter rest for 15 minutes.

While the batter is resting, preheat your waffle iron. Using 1/3 cup measure, cook the waffles according to your waffle maker's instructions. As you finish each waffle, set it on a wire rack to ensure it stays crisp. Repeat until all the waffle batter has been used. The waffles can be kept warm in a 200 degree F oven until ready to eat. Serve with maple syrup and fresh berries. Enjoy!
Makes 8 waffles
0 comments:
Post a Comment